Can Easy Lettering Make Your Notes and Cards Look Better Fast?
Why Is Easy Lettering a Good Place to Start?
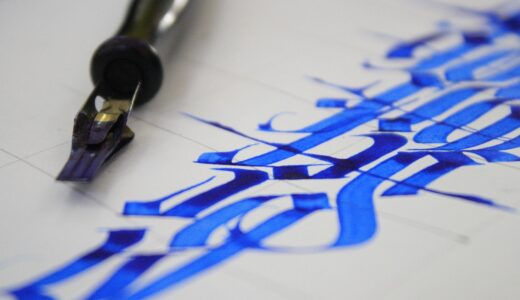
Easy lettering is a simple way to make notes, cards, gift tags, classroom boards, and planner pages look more personal without spending years on calligraphy practice. If you are putting together a small stationery kit, start with paper, a pencil, and one pen that feels easy to control, then check the Lettering section for ideas that suit desk work, school projects, and weekend crafts.
Creative Writing That Fits Real Life
Lettering is not only for wedding envelopes or neat studio photos. You can use it on a lunchbox note, a study header, a scrapbook date, or a quick label for a storage box.
The main idea is to make words easier to notice and better to read. A birthday tag written by hand at 10 p.m. may be a little uneven, but it can still feel warmer than a printed sticker.
Hand Skills Backed by Learning Research
There is also a learning point worth noting. In January 2024, Frontiers in Psychology published a high-density EEG study with 36 university students, and the researchers reported more elaborate brain connectivity patterns when participants wrote words by hand than when they typed them.
That does not mean a brush pen will make anyone smarter. It supports a plain, useful point: when you form letters by hand, your fingers, eyes, and attention need to work together.
Everyday Supplies With Real Demand
Lettering also makes sense because pens and paper are still common daily products. The National Retail Federation and Prosper Insights & Analytics reported in July 2026 that K-12 shoppers in the United States planned to spend $146.45 on school supplies on average, with total K-12 school supply spending expected to reach $7.3 billion.
This is retail spending data, not art-class data, so it should be read in that way. The practical takeaway is clear enough: a low-tool hobby like easy lettering fits supplies many homes already buy.
What Tools Do You Need for Easy Lettering?
You do not need a drawer full of markers to begin. Too many tools can slow beginners down because every pen feels a little different. Start with a small setup and learn how each tool behaves. When your lines become steadier, then add color, metallic ink, or wider brush tips.
Smooth Paper Before Fancy Paper
Smooth paper is more useful than a nice cover. Rough paper can catch brush tips and leave fuzzy edges, which makes practice feel harder than it needs to be.
Tombow Europe beginner materials mention Bristol-style paper around 250 gsm to 300 gsm for some marker work, but everyday practice can stay simpler. A smooth dot-grid notebook, marker paper, or clean printer sheet can work if the ink does not bleed too much.
Small Brush Pens for Better Control
A large brush pen can make thick lines, but it may feel loose when you are new. A small brush pen or hard-tip brush pen is often easier to guide across the page.
Tombow USA beginner guidance explains that brush pressure changes the line from fine to medium or bold. For beginners, this means the pen is only part of the job, and hand pressure is the skill you are really training.
Pencil Guides, Erasers, and Rulers
Guides are not cheating. They help keep letters from sliding downhill across the page, especially when you are working on cards, tags, or planner pages.
Light pencil lines also let you check spacing before the final ink goes down. A small starter kit can stay very basic:
- One smooth practice notebook or pad
- One pencil and a clean eraser
- One ruler for baselines and margins
- One black fineliner for faux calligraphy
- One small brush pen for pressure practice
How Do Basic Strokes Make Lettering Easier?
Most beginners try to write the full alphabet right away. That feels normal, but it can make practice look messy. Easy lettering improves faster when you break letters into small parts that repeat. The same strokes come back again and again, so a little stroke practice saves time later.
Thin Upstrokes and Thick Downstrokes
Brush lettering is built on contrast. Move upward with light pressure, then move downward with stronger pressure.
This thick-and-thin pattern creates the usual brush pen look. Practice lines before full words: try ten light upstrokes, ten heavy downstrokes, and ten pairs joined together. It may feel dull at first, but after a short time your hand starts to understand the movement.
Ovals, Loops, and Entry Strokes
Letters such as a, d, g, o, and q use oval shapes. Letters such as h, l, b, and k need tall loops, and entry strokes help words start softly instead of looking cut off.
Draw these shapes slowly and keep them close to the same height. If an oval leans too much, turn the paper a little. The page can move; your wrist does not have to do all the work.
Slow Practice Beats Fast Copying
Speed hides problems, while slow practice makes them easier to see. A good beginner pace is almost like drawing each letter instead of writing it.
Pause between strokes, lift the pen, and then place it down again. This small habit gives cleaner joins and fewer shaky curves. It can also help left-handed writers avoid dragging a hand through wet ink.
Which Easy Lettering Styles Should You Practice First?
Pick styles that give quick results. You can study advanced scripts later, but beginner pages should help you learn spacing, balance, and control. Three styles are useful at the start because they work with common pens and simple paper. See also: Gift Guide.
Faux Calligraphy for Any Pen
Faux calligraphy is usually the easiest first style because you can use a normal pen. Write a word in cursive or joined print, then draw a second line beside each downstroke.
Fill the open space with ink, and you get a calligraphy look without using brush pressure. This style works well for envelopes, classroom posters, recipe cards, and headers in study notes.
Simple Serif Letters for Clean Labels
Serif lettering uses small finishing strokes at the ends of letters. It looks tidy on labels because the letter shapes feel stable and easy to read.
Start with block capitals, then add short horizontal feet and caps. Keep the serifs the same length where you can. This style is useful for pantry jars, file folders, handmade flashcards, and anything that needs to be read quickly.
Bounce Lettering for Casual Cards
Bounce lettering lets some letters sit above or below the baseline. It gives cards, planner quotes, and scrapbook pages a more relaxed look.
Use it with a light hand. If every letter jumps, the word can turn messy. Let only a few letters bounce, usually letters with loops or tails, so the result feels casual but still readable.
How Can You Practice Without Messy Results?
Good practice is short, clear, and easy to repeat. Long sessions can make your hand tired, and tired hands are harder to control. A ten-minute routine often works better than a one-hour session that ends with smudges and frustration.
Ten-Minute Warmups on Grid Paper
Set a timer and practice one small skill. On Monday, do upstrokes and downstrokes. On Tuesday, draw ovals. On Wednesday, write one word five times.
Grid or dot paper helps because you can check height and slant without measuring every line. Keep your old pages too, because they show progress better than memory does.
Real Projects Like Tags, Envelopes, and Planners
Practice feels easier when the page has a real use. Letter the month name in a planner, write a gift tag, or make three labels for desk supplies.
Small projects teach space planning because the word has to fit the object. That is different from filling a blank sheet. They are also forgiving, because if one tag goes wrong, it is just one tag.
Quick Fixes for Spacing, Ink, and Tired Hands
If your lettering looks crowded, pencil the whole word first and mark the center letter. If ink feathers, change to smoother paper or use a drier fineliner.
If lines wobble, slow down and rest your forearm on the desk. Wait 20 to 30 seconds before erasing pencil guides, and wait longer for juicy markers. No reliable public dataset gives a universal number of days to master easy lettering, so avoid fixed promises. Judge progress by cleaner spacing, steadier curves, and fewer smudges.
FAQ
Q1: What Is the Easiest Lettering Style for Beginners? A: Faux calligraphy is usually the easiest because it works with almost any pen. You write the word first, add weight to the downstrokes, then fill the added space.
Q2: Do You Need Brush Pens for Easy Lettering? A: No. Brush pens help with thick and thin strokes, but a fineliner, gel pen, or pencil can still create clean lettering. Start with control before buying more tools.
Q3: How Long Should You Practice Lettering Each Day? A: Ten focused minutes is enough for most beginners. Practice one skill at a time, such as ovals, spacing, or downstrokes, instead of filling pages without a goal.
Q4: Why Does Brush Lettering Look Shaky at First? A: Shaky lines often come from moving too fast, gripping the pen too tightly, or using rough paper. Slow down, loosen your hand, and try smoother paper.
Q5: Can Easy Lettering Be Used for School or Office Notes? A: Yes. Use simple headers, labels, and short highlight words. Keep decorative lettering for key sections so the page stays readable and useful.